The Sushiquik Sushi Making Kit
Is it Really better, faster and easier to make a Sushi roll with this Octopus than it is to use a Traditional Sushi mat?
(Keep reading to find out the answer!)


Product: Sushiquik Sushi Making Kit
Type of Kit: Non-Traditional
Price Range: Between $35.00 dollars and $75.00 depending on which variation of this kit that you get
I'm a traditional kind of guy. And I'm somewhat hesitant to change. But, I'm also lazy (or always looking for more ways to do things faster and more efficiently I should say...) and want to do things in the easiest ways possible.
I did read quite a few reviews (and it rated highly) before ordering the sushiquik sushi making kit, as its not exactly as cheap as a bamboo sushi mat. But I probably would have ordered it anyway because the device does looks so darn intriguing.
Ok. Without further delay, let's open her up...


There were quite a few pieces to the sushiquik sushi making kit. I found that its best to just lay the instructions to the side and follow them step by step.
If you're a typical guy and you already wadded up the instructions and threw them into the trash, well... go dig 'em back out. It's gonna be easier just to follow them. I know. It's against your nature...
Just suck it up.
We'll use the pieces in the examples below while I follow the instructions.
To demonstrate using the sushiquik sushi making kit, I decided to do a California Roll. If you want to know how to make the roe-mayo sauce or interested in knowing any other details, then visit our California Roll Recipe.


The first thing the instructions have you do is attach the black base to the plastic mat. To do that you insert the tab on the bottom of the mat (center picture) into the slot at the top of the base (left picture).
Set the base down in front of you, with the narrow side closest to you.


Now lay a nori sheet down on the plastic mat shiny side down and narrow end closest to you. Place the green training frame onto the mat and make sure the slot with the word "TOP" above it is on the end farthest away from you.
Check that no nori shows through the slot. If it does, then slide it down (toward you) until it does not show in the slot.


Spread sushi rice evenly over the surface of the nori so that it is level with the height of the frame (left picture above)
Remove the training frame (right picture above).


In the pictures above, I added wasabi, roe-mayo sauce and crab.


Next we add cucumber and then avocado. Now we are ready to roll...


Rolling is kind of similar to rolling with a traditional bamboo sushi mat. The mat is lifted up and pulled over while holding the ingredients in (left most picture). Continue rolling until you get to the end of the stand and then tighten across the roll with your fingers.
I have to admit, I had problems with figuring out how to "tighten" the roll because it wanted to fall off of the end of the stand. And I didn't have any mat left at the end to grab and hold while pulling and tightening with my right hand like I am use to with a traditional sushi mat.
These pictures were taken on my first try and maybe I wasn't doing it exactly right or maybe it takes a little practice. I don't know.
Either way I decided to try it again, but this time take it off the stand before I tried to roll.


In the picture above on the left, I am rolling for the second time but this time without the base. I liked that it couldn't fall off the base at the end of the mat (which deformed my first roll so that it wasn't round anymore and had like a "V" in it), but I still couldn't do the tightening like I'm use to with a traditional mat.
And if you notice in the picture above on the right, both times I got rice coming out from around the seal of the nori.
I don't know what I was doing wrong. Again, maybe it takes more practice. But honestly, even on my first few tries with a real sushi mat I didn't have rice problems like I was having here.

I went on and cut the sushi roll using the guide and placed them on a sushi plate.

I think the roll came out just ok. I put the rice that was coming out from around the seal on the bottom.
Again, maybe the rolls will get better the more I use the sushiquik sushi making kit.
Sushiquik Sushi Making Kit
(Final Thoughts)
|
Pro's |
Con's |
|
|
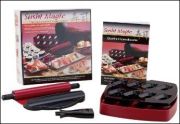
I probably won't use the sushiquik again. I'd rather just use a traditional sushi mat or the sushi magic sushi making kit.
And to me that's the whole point of getting a product like this anyway. To make sushi rolling easier and/or better.
To me, this product did neither.
But don't take just my word for it. Check out the product and the reviews on Amazon. It get's 4 1/2 to 5 stars and is a best seller. So maybe I missed something.
Either way, from what I saw in my test drive my recommendation is...
Recommendation: Don't buy it.
Other Sushi Making Kit Reviews:
Don't despair. I have reviewed several other sushi making kits and one comes with a strong buy recommendation.
Check them out. Sushi Magic Sushi Making Kit and the Sushezi.
Or listed below are some of the best selling sushi making kits on Amazon.
Like this Page?
|
|
Looking for Something in Particular? Search this Site using Google Below!
Like this Site?
Like this Site?


Visit AllAboutSushiGuide's profile on Pinterest.

Follow me on Pinterest

New! Comments
Have your say about what you just read! Leave me a comment in the box below.